Storage categories
A storage category is used with putaway rules, as an extra location attribute to automatically propose optimal storage locations for products.
Follow these steps to complete the setup:
Define a storage category with specific limitations
Assign a category to storage locations
Add the storage category as an attribute to a putaway rule
See also
Note
Assigning categories to storage locations tells Odoo these locations meet specific requirements, such as temperature or accessibility. Odoo then evaluates these locations, based on defined capacity, and recommends the best one on the warehouse transfer form.
Configuration
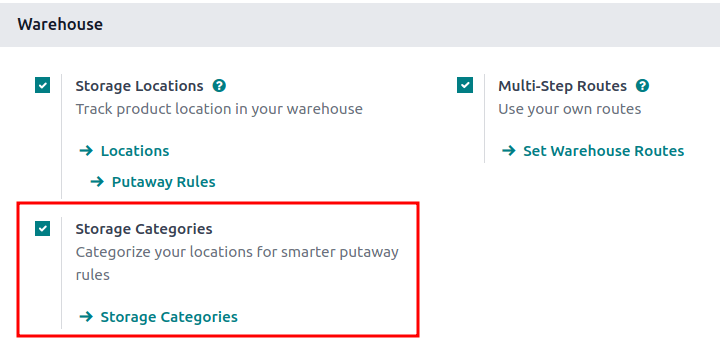
To enable storage categories, go to . Then, in the Warehouse section, ensure the Storage Locations and Multi-Step Routes features are enabled.
Next, activate the Storage Categories feature. Finally, click Save.

Define storage category
A storage category with specific limitations must be created first, before it is applied to locations, in order to decide the optimal storage location.
To create a storage category, go to , and click Create.
On the storage category form, type a name for the category in the Storage Category field.
Options are available to limit capacity by weight, product, and package type.
Note
Weight limits can be combined with capacity by package or product (e.g. a maximum of one hundred products with a total weight of two hundred kilograms).
While it is possible to limit capacity by product and package type at the same location, it may be more practical to store items in different amounts across various locations, as shown in this example of capacity by package.
The Allow New Product field defines when the location is considered available to store a product:
If location is empty: a product can be added there only if the location is empty.
If products are the same: a product can be added there only if the same product is already there.
Allow mixed products: several different products can be stored in this location at the same time.
Tip
When clicked, the Location smart button shows which storage locations the category has been assigned to.
Capacity by weight
On a storage category form (), set a maximum product weight in the Max Weight field. This limit applies to each location assigned this storage category.
Capacity by product
In the Capacity by Product tab, click Add a Line to input items, and enter their capacities in the Quantity field.
Example
Ensure only a maximum of five Large Cabinets and two Corner Desk Right Sit are stored at a
single storage location, by specifying those amounts in the Capacity by Product tab
of a storage category form.

Capacity by package
For companies using packages, it becomes possible to ensure real-time storage capacity checks, based on package types (e.g., crates, bins, boxes, etc.).
Important
Enable the Packages feature in to show the Capacity by Package tab.
Example
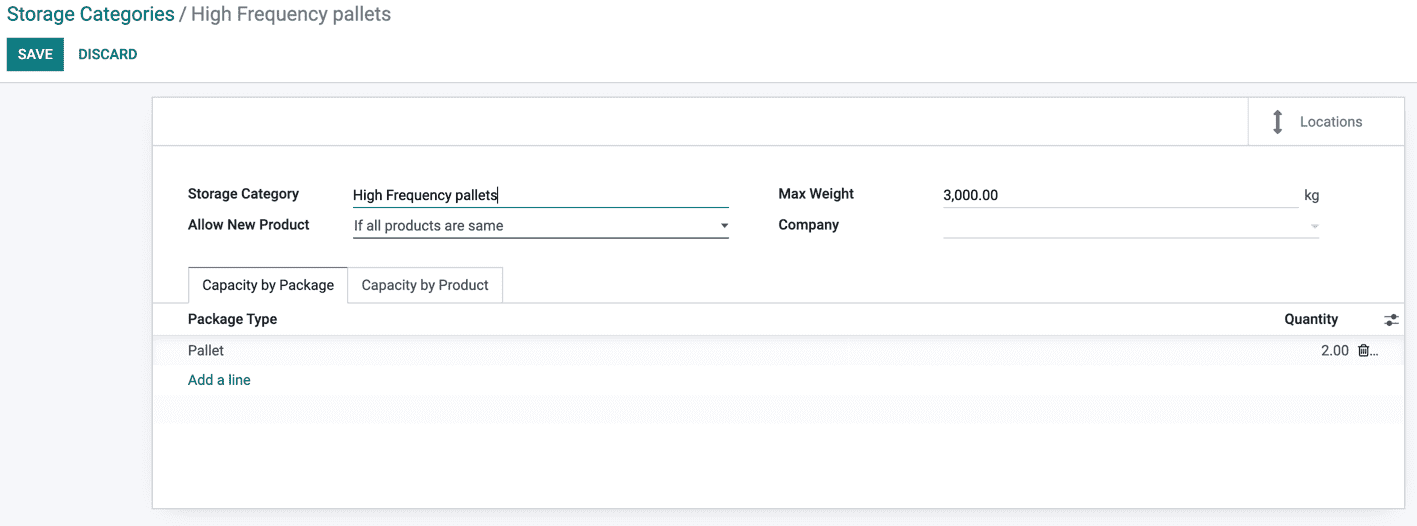
Create putaway rules for pallet-stored items, by creating the High Frequency pallets storage
category.
In the Capacity by Package tab, specify the number of packages for the designated
Package Type, and set a maximum of 2.00 Pallets for a specific location.

Assign to location
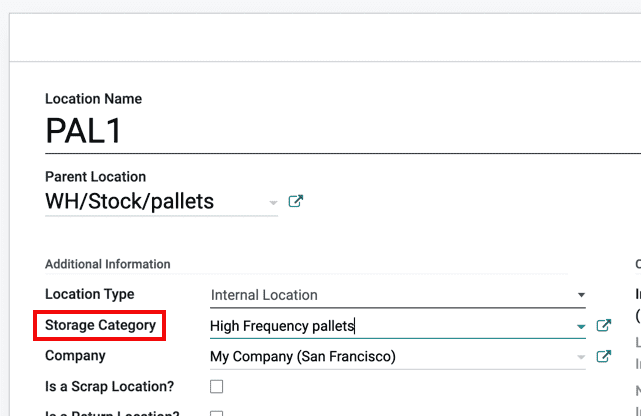
Once the storage category is created, assign it to a location. Navigate to the location by going to , and select the desired location. Then, select the created category in the Storage Category field.
Example
Assign the High Frequency pallets storage category (which limits pallets stored at any location
to two pallets) to the WH/Stock/pallets/PAL 1 sub-location.

Putaway rule
With the storage category and location set up, create the putaway rule by navigating to .
Click the Create button to create the putaway rule. In the Having Category field of the new putaway rule form, select the storage category.
Example
Continuing the example from above, the High Frequency Pallets storage category is assigned to
the putaway rule directing pallets of lemonade to locations with the High Frequency Pallets
storage category assigned to them.

Use case: limit capacity by package
To limit the capacity of a storage location by a specific number of packages, create a storage category with a Capacity By Package.
Continuing the example from above, the High Frequency Pallets storage category is assigned to the
PAL1 and PAL2 locations.
Then, putaway rules are set, so that any pallets received in
the warehouse are directed to be stored in PAL1 and PAL2 locations.
Depending on the number of pallets on-hand at each of the storage locations, when one pallet of lemonade cans is received, the following scenarios happen:
If
PAL1andPAL2are empty, the pallet is redirected toWH/Stock/Pallets/PAL1.If
PAL1is full, the pallet is redirected toWH/Stock/Pallets/PAL2.If
PAL1andPAL2are full, the pallet is redirected toWH/Stock/Pallets.