Viva Wallet
Connecting a Viva Wallet payment terminal allows you to offer a fluid payment flow to your customers and ease the work of your cashiers.
Note
Viva Wallet lets you turn your phone into a mobile card reader: Tap On Phone.
Configuration
Start by creating your Viva Wallet account on Viva Wallet’s website.
Locate your Viva Wallet credentials
When configuring Viva Wallet in Point of Sale, you need to use specific credentials that are available in your Viva Wallet account. These credentials include your Merchant ID, API key, POS API credentials, and Terminal ID number.
Merchant ID and API key
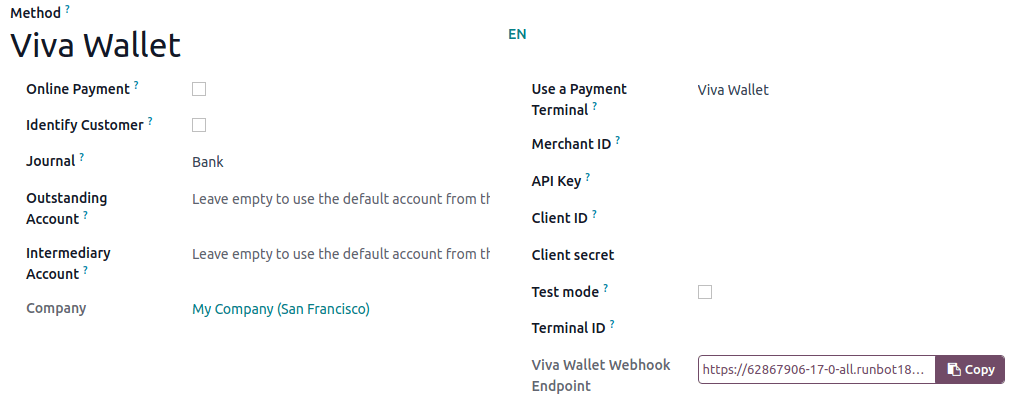
Locate your Merchant ID and API key following the Viva documentation. Then, save the keys and paste them into the Odoo Merchant ID and API Key fields when creating the payment method.

Note
These credentials are used for APIs that authenticate with Basic Auth.
POS API credentials
Locate and generate your POS API credentials following the Viva documentation. Then, save the keys and paste them in the Odoo Client secret and Client ID fields when creating the payment method.
Warning
These credentials are only displayed once. Ensure you keep a copy to secure them.

Note
These credentials are used for Android and iOS POS Activation requests, as well as the Cloud Terminal API.
Terminal ID
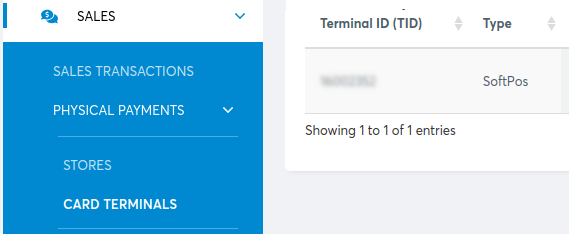
Your terminal ID number is used to identify your terminal. To find it:
Go to your Viva Wallet account and select the relevant account.
Go to in the navigation menu.
The terminal ID number is located under the Terminal ID (TID) column. Save it to paste it into the Terminal ID field when creating the payment method.

Configure the payment method
Activate the POS Viva Wallet module to enable the payment terminal.
Create the related payment method by going to and clicking New.
Set the journal type as Bank.
Select Viva Wallet in the Use a Payment Terminal field.
Fill in the mandatory fields with your:
Save the form and copy the generated webhook URL from the Viva Wallet Webhook Endpoint field. This URL is necessary when configuring the webhook.

Configure the webhook
Webhooks allow you to receive real-time notifications whenever a transaction occurs within your Viva Wallet account. Set them up for payment transactions following the Viva documentation.
See also
Link the payment method to a POS
You can select the payment method in your POS settings once the payment method is created. To do so, go to the POS’ settings and add the payment method under the Payment methods field of the Payment section.
Pay with a payment terminal
When processing a payment, select the related payment method. Check the amount and click on Send. Once the payment is successful, the status changes to Payment Successful.
Note
- In case of connection issues between Odoo and the payment terminal, force the payment by clicking on Force Done, which allows you to validate the order.This option is only available after receiving an error message informing you that the connection failed.
To cancel the payment request, click cancel.